tuning of driver Vref
A very important step to properly set up our 3d printer is tuning of driver’s Vref of the motor’s step by step. Very often a hasty calibration of these drivers leads to lose some steps or even to their break due to overheating…
tuning of driver Vref
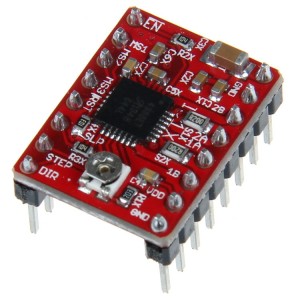
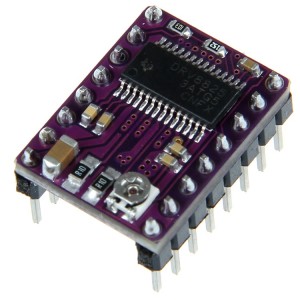
I have used both the most current DRV8825 and the A4988 StepStick, both on different printers with different cards. The main difference between the two drivers concerns the capacity of current supplied and the number of managed steps: 2A and 16 microstep for the A4988, 2.5A and 32 microstep for the DRV8825. Obviously the cost varies and the A4988 are naturally cheaper.
The first time I turned on the electronics of my first 3D printer equipped with the A4988 and I tried to move the engines, I got a hiss, an overheating of the driver and no movement from the engine. I found the cause on the net, it was probably due to badly regulation of the Vref.
I also found how to measure it by using the multimeter and how to suitably adjust the driver vref. The Vref measurement must be carried out with a multimeter set to read a fairly low DC voltage, with the positive (+) tip in contact with the top of the trimmer and the negative one to a mass (GND). Measuring the Vref with the multimeter I read a value (0.12V) which was definitely too low compared to the necessary one to get the right current needed for the stepper motor to move.
After obtaining a plastic screwdriver (do not use a metal one) and removing the power supply to the board as a precaution, I started by turning clockwise the trimmer very little and retrying the movement. The whistle was gone, the driver took longer to reach a high temperature and the engine moved. On the multimeter I had 0.35V.
I then keep on moving the trimmer a little bit in the same direction as before, trying to run the engine and finally the engine was moving correctly and the whistle of the driver was definitely gone. On the multimeter I had 0.55V.
However the driver’s temperature was increased, this made me caption that I need the heatsink mounted, and the drivers must always be under a good ventilation. I also point out that for the two motors of the “Z” axis that share the driver, the Vref value I set is slightly higher (0.63V). I used the same method for the DRV8825 and the value of the Vref which is more suitable to my motors is 0.63V.
I stressed “to my motors” because the Vref values that I have set on both kind of drivers refers to the voltage which “regulates” the current intensity supplied by the driver itself, which is precisely necessary to my motors. If yours should be more or less demanding, the values to be set must be those that best allow the movement of your stepper motors.
Do not underestimate the importance of adjusting the driver vref correctly, too low or too high a value can affect both on the prints and on the electronics that equips your 3D printer.
if you want to know more, if you need help write to info@3deasy.it
if you want to be updated on the next article, fill in the following fields to subscribe to the newsletter.


