Introduction to Repetier Host
Many 3d printers can be equipped with an SD card reader to print autonomously, those that do not have this possibility must use a personal computer, connected via USB, with software capable of managing the printer itself.
One of the most used free software is Repetier Host and today I want to describe its most basic features. After downloading and installing it, leaving all the options that it offers us by default, we will have to set it to allow the connection and configuration of our printer. When Repetier Host starts, a window will appear where on the right we find the “Printer settings” button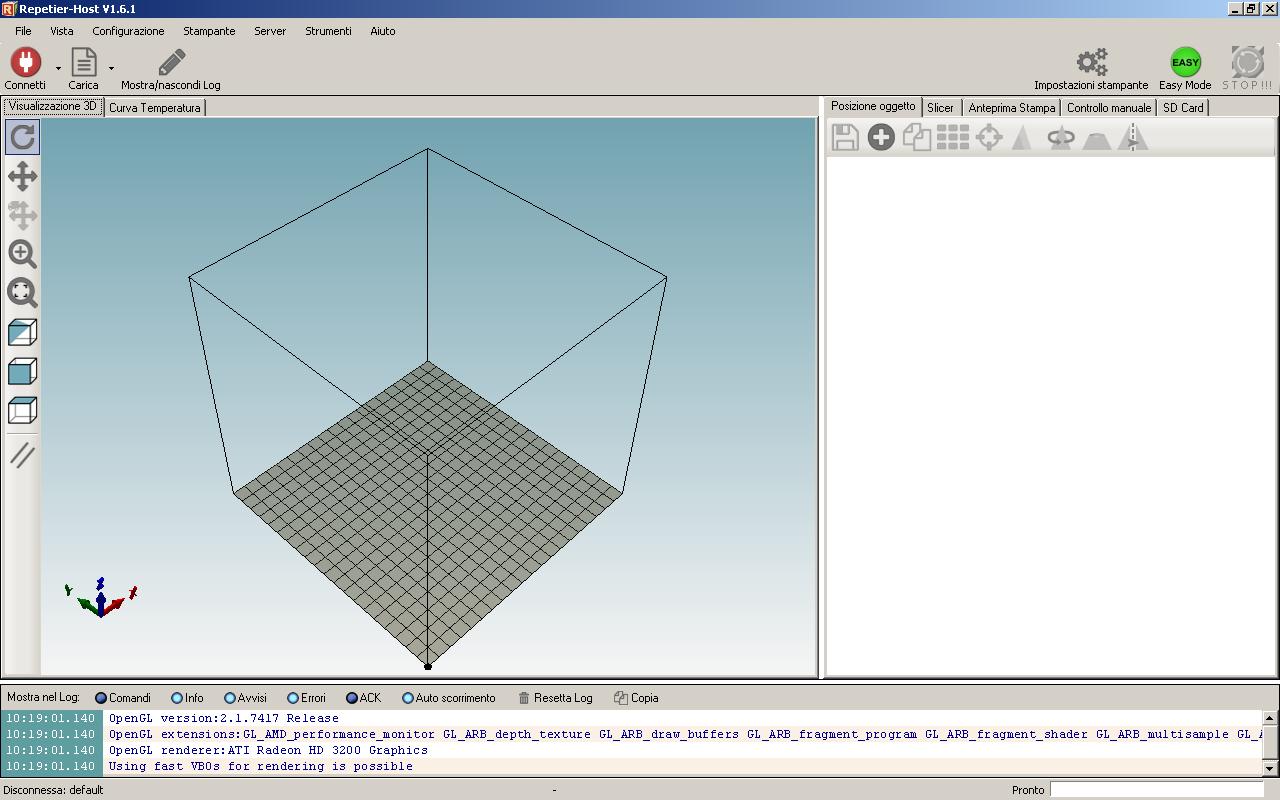
selecting it will open the configuration panel where we find the items Connection, Printer, Print bed options, Scripts and Advanced
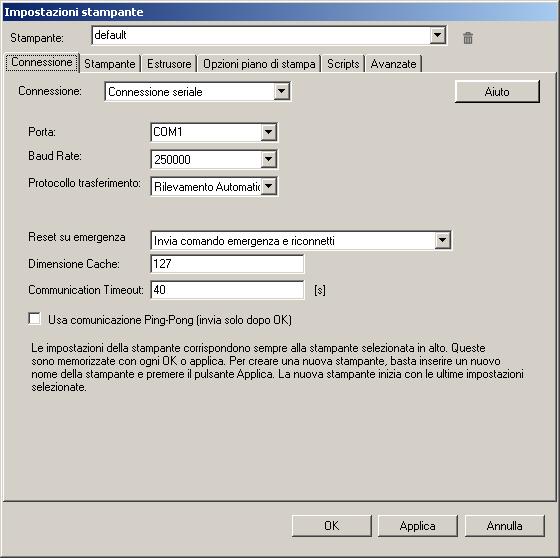
In the first item of Repetier Host, generally, except for the port and the connection speed, we will not have to change anything and also in the “Printer” tab you usually leave all the default, also because most of the parameters that can be changed here are affected by those provided in the firmware.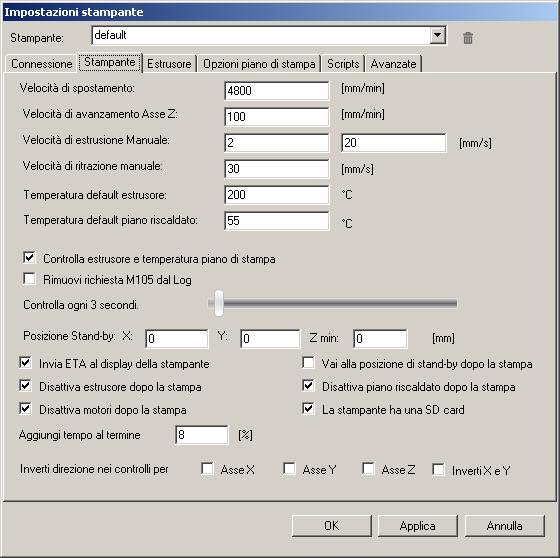
Under the heading “Extruder”, on the other hand, we will certainly have to change something, for example the diameter of our nozzle or the maximum temperature that can be reached for both the hotend and the heatedbed.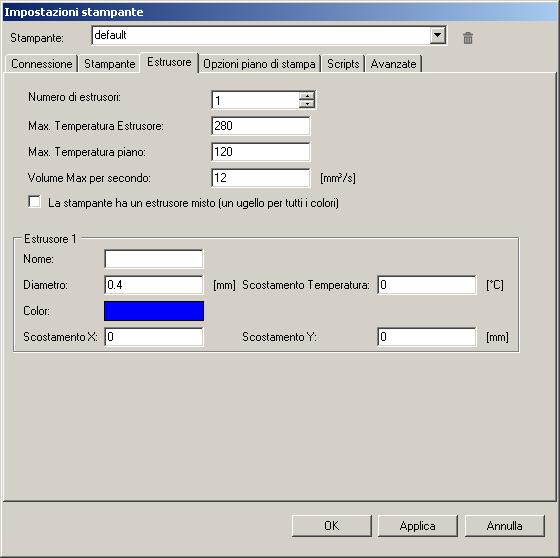
Under “Printing plane options” we can set the shape and size of the plane, other information to determine the correct positioning of the piece for printing and we can also define points other than the standard for our home.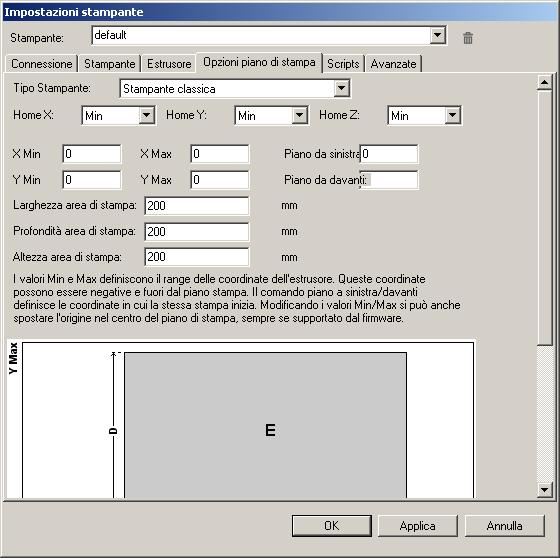
The other two Repetier Host items, Scripts and Advanced, are currently neglected as they are hardly used.
After correctly setting the items listed so far, we will be able to save the configuration just made with the name of our printer.
At this point we can connect to the printer with the dedicated button at the top left. The next button is the one that allows us to load the file of the object to be printed.
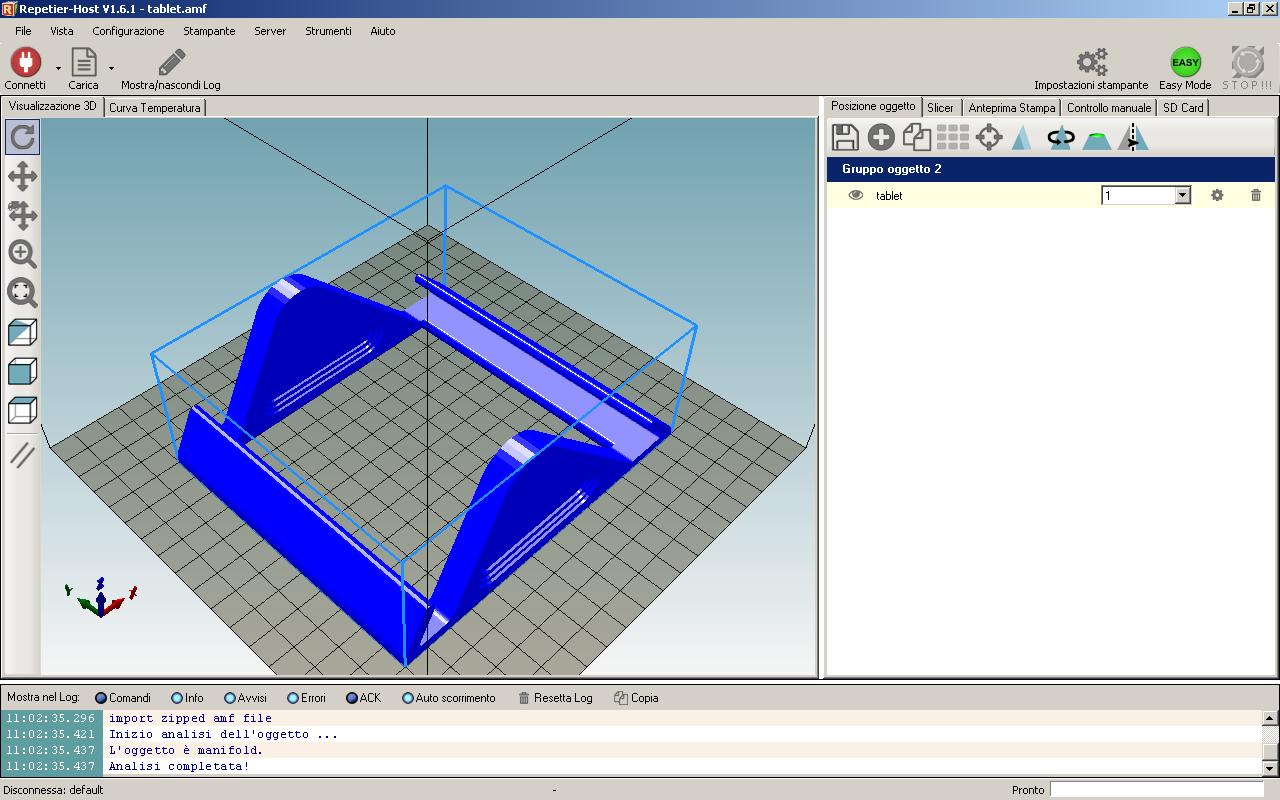
We will notice that, on the right side of the Repetier Host window, some icons will be highlighted in the “Object position” tab. The first three are very intuitive and respectively allow you to save, add or duplicate the imported piece.
Then follows an icon consisting of nine rectangles that reposition the pieces if we have loaded more than one. The next icon centers the single object on the plate.
The triangular shape takes on particular importance if you want to print, for example, a preview of an object, in fact its purpose is to vary the size of the object on the three axes both by increasing and decreasing them.
The following icon allows us to rotate the object on any of the three axes, thus allowing us to choose, if necessary, the most convenient side to use as the basis for the print. The next one allows us to inspect the object, allowing you to cut the same to also check the various sections.
The last icon reflects the object to be printed on the plane. It can be useful for example in case we need two mirror objects and we only have a drawing of the two. In the following image we see the effects of its use compared to the previous image
The next tab of Repetier Host, “Slicer” allows us to choose which software to use for slicing the object and in relation to this also some settings. In addition we can also decide a general printing speed, a filling coefficient of the piece, whether or not to enable the use of the fans for cooling and the settings related to the extruder, always taking them from those of the chosen slicer.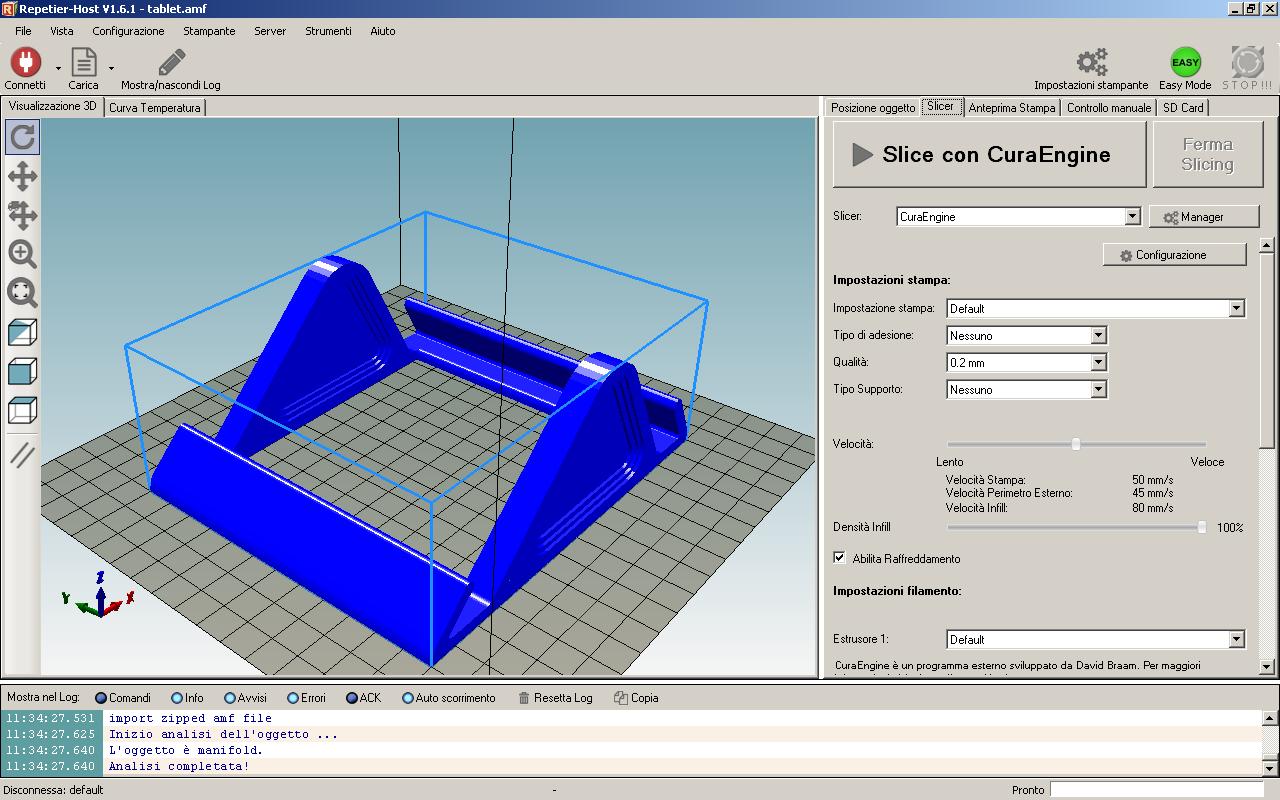
By pressing the “Slice with ‘the chosen software'” button we will start the preparation of the file in G-code and we will automatically end up on the “Print preview” tab which, in addition to the possibility of saving, modifying, editing and exporting the G-code , also provides us with information about the estimated printing time, the number of layers and other utilities.
The next tab is the one relating to the “Manual control” of the printer. Here we can interact directly with the motors, the hotend, the bed, the fans, dynamically increase the printing speed and the extrusion flow, and there is also the possibility of sending commands in G-code directly to the printer. In my opinion, this part is very useful in the printer configuration and calibration phase, especially if used together with the part of the log which is located downwards and which can be hidden or shown through the “Show / hide Log” icon.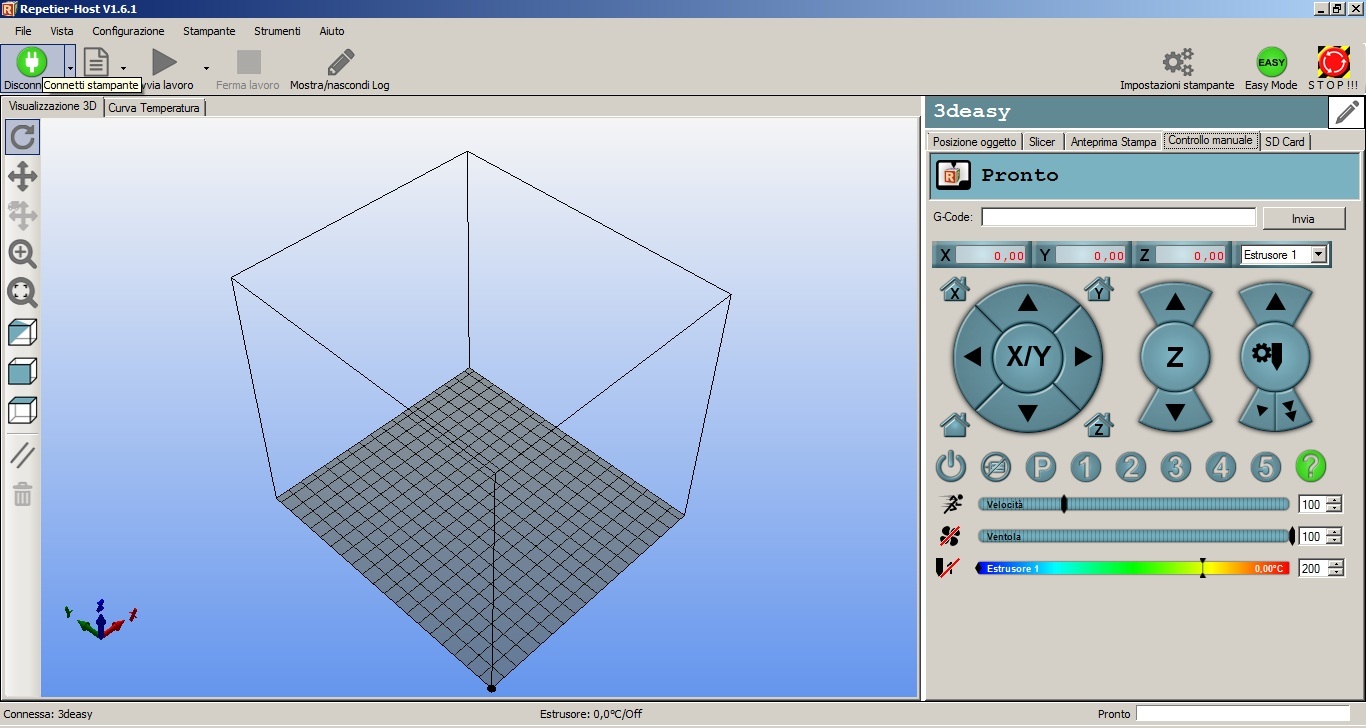
the last tab of Repetier Host relates to the management of the SD Card, it allows its management and its use.
Soon we will also deepen Repetier Host, for the moment we have known the basicsProssimamente approfondiremo anche Repetier Host, per il momento ne abbiamo conosciuto le basi.
download Repetier Host here
if you want to know more, if you need help write to info@3deasy.it
if you want to be updated on the next article, fill in the following fields to subscribe to the newsletter.
